How to Build Your First App in iOS using Swift
Before starting to develop new iPhone App you should install xcode latest version and also have some knowledge of swift language.Here we describe how to create your first "hello World" App in a simple manner and you will get initial knowledge to work with xcode IDE to manage iPhone App.
At the end of this tutorial you will get skills of following domains..
- Introduction to Xcode Development Environment and how to handle user Interface.
- Syntax structure of new swift programming language of iOS.
- Learn How to Compile and test your app on simulator.
- Basic knowledge of View Controllers and MVC Architecture.
Let's Create New Project.Just open Xcode you will see a welcome screen to select project type

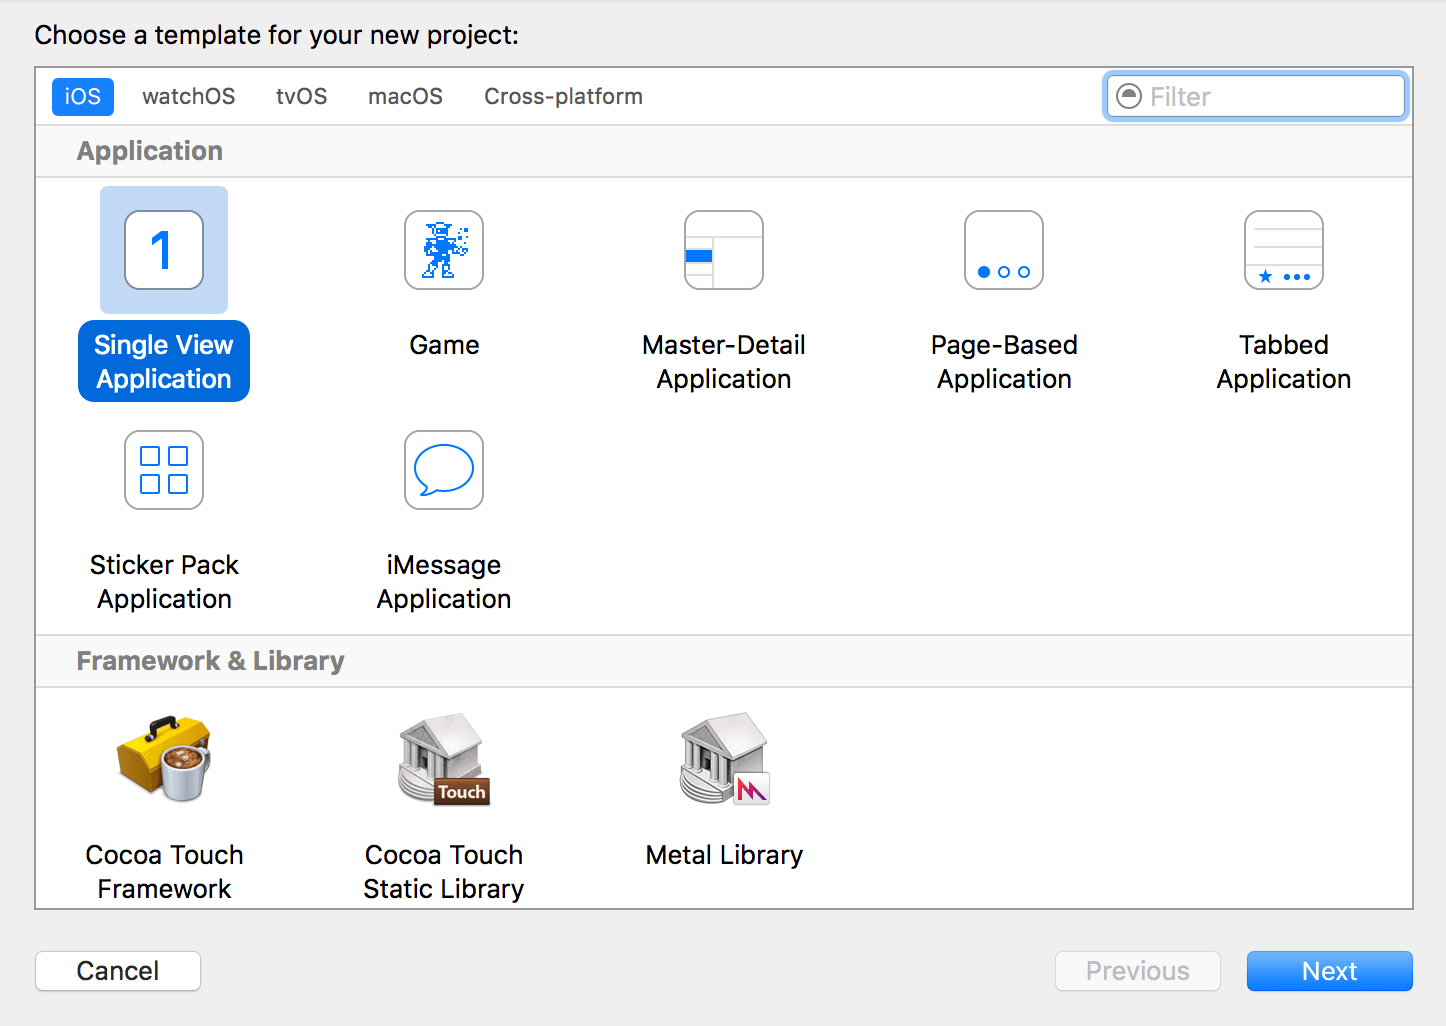
On the next screen of Xcode various project templates will shown, now select Single View Application for creating an new iOS app.
In the next view specify some project options like this..
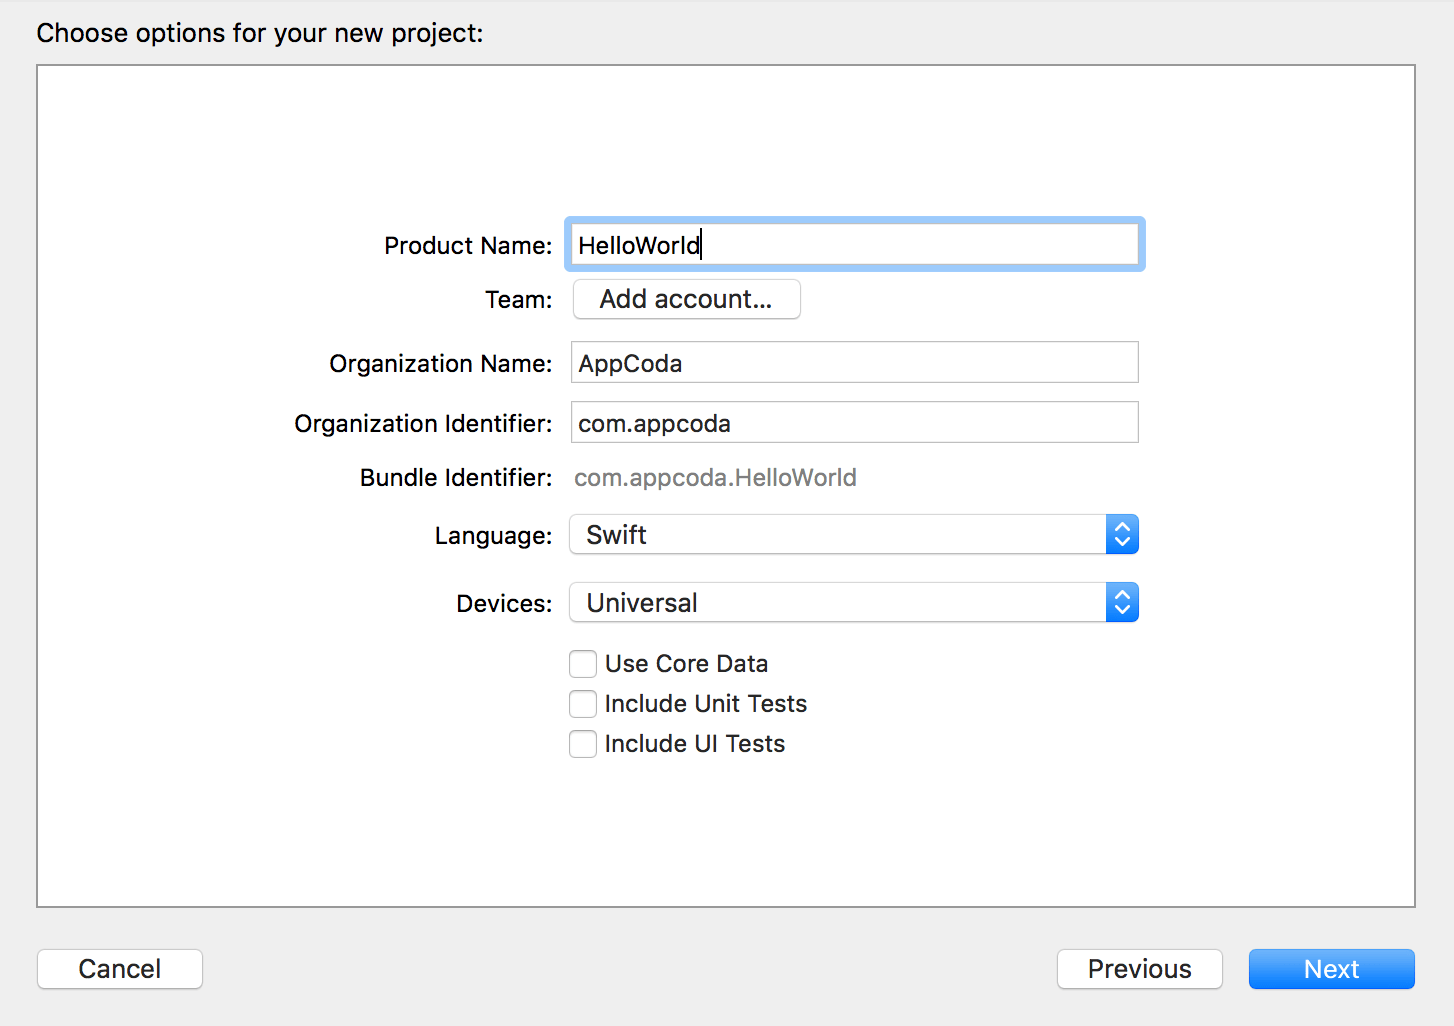
- Product Name: Write the name of your app "HelloWorld".
- Team: It will prompt you to sign in with your Apple ID so just leave it blank.
- Organization Name: Give the name of your organization like "DZONE" or your personal name.
- Organization Identifier: Here xcode ask for domain name of organization so fill it "dzone.co.in".
- Bundle Identifier: dzone.co.in.HelloWorld - It's a unique identifier of your app and used at the time of app submission. Xcode automatically fill it from previous informations.
- Language: Choose Swift - Xcode 8 supports both Objective-C and Swift for iPhone app development.
- Devices: iPhone - Select "iPhone" for this project. Here we build project for iPhone only.
- Use Core Data: keep it unchecked - at this initial stage we do not need Core Data for our simple project.
- Include Unit Tests: Leave it unchecked - we ignore unit tests for our project.
- Include UI Tests:Again keep it unchecked - We do not need UI tests for this simple project.
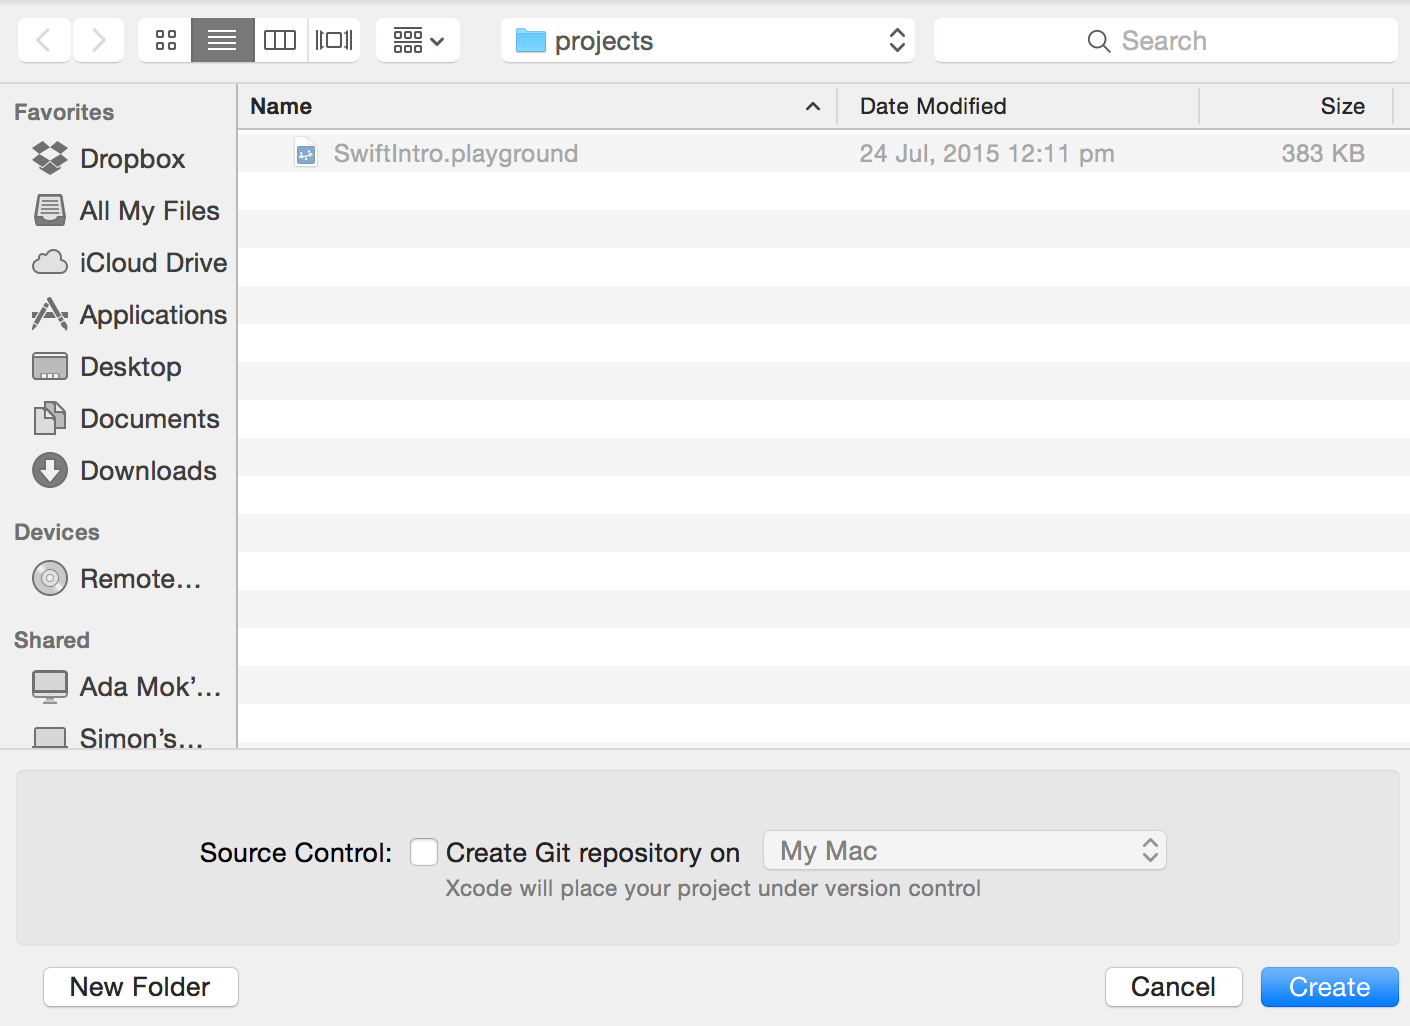
Now click "Next",It will ask the location to save the First "Hello World" project on your Mac PC.
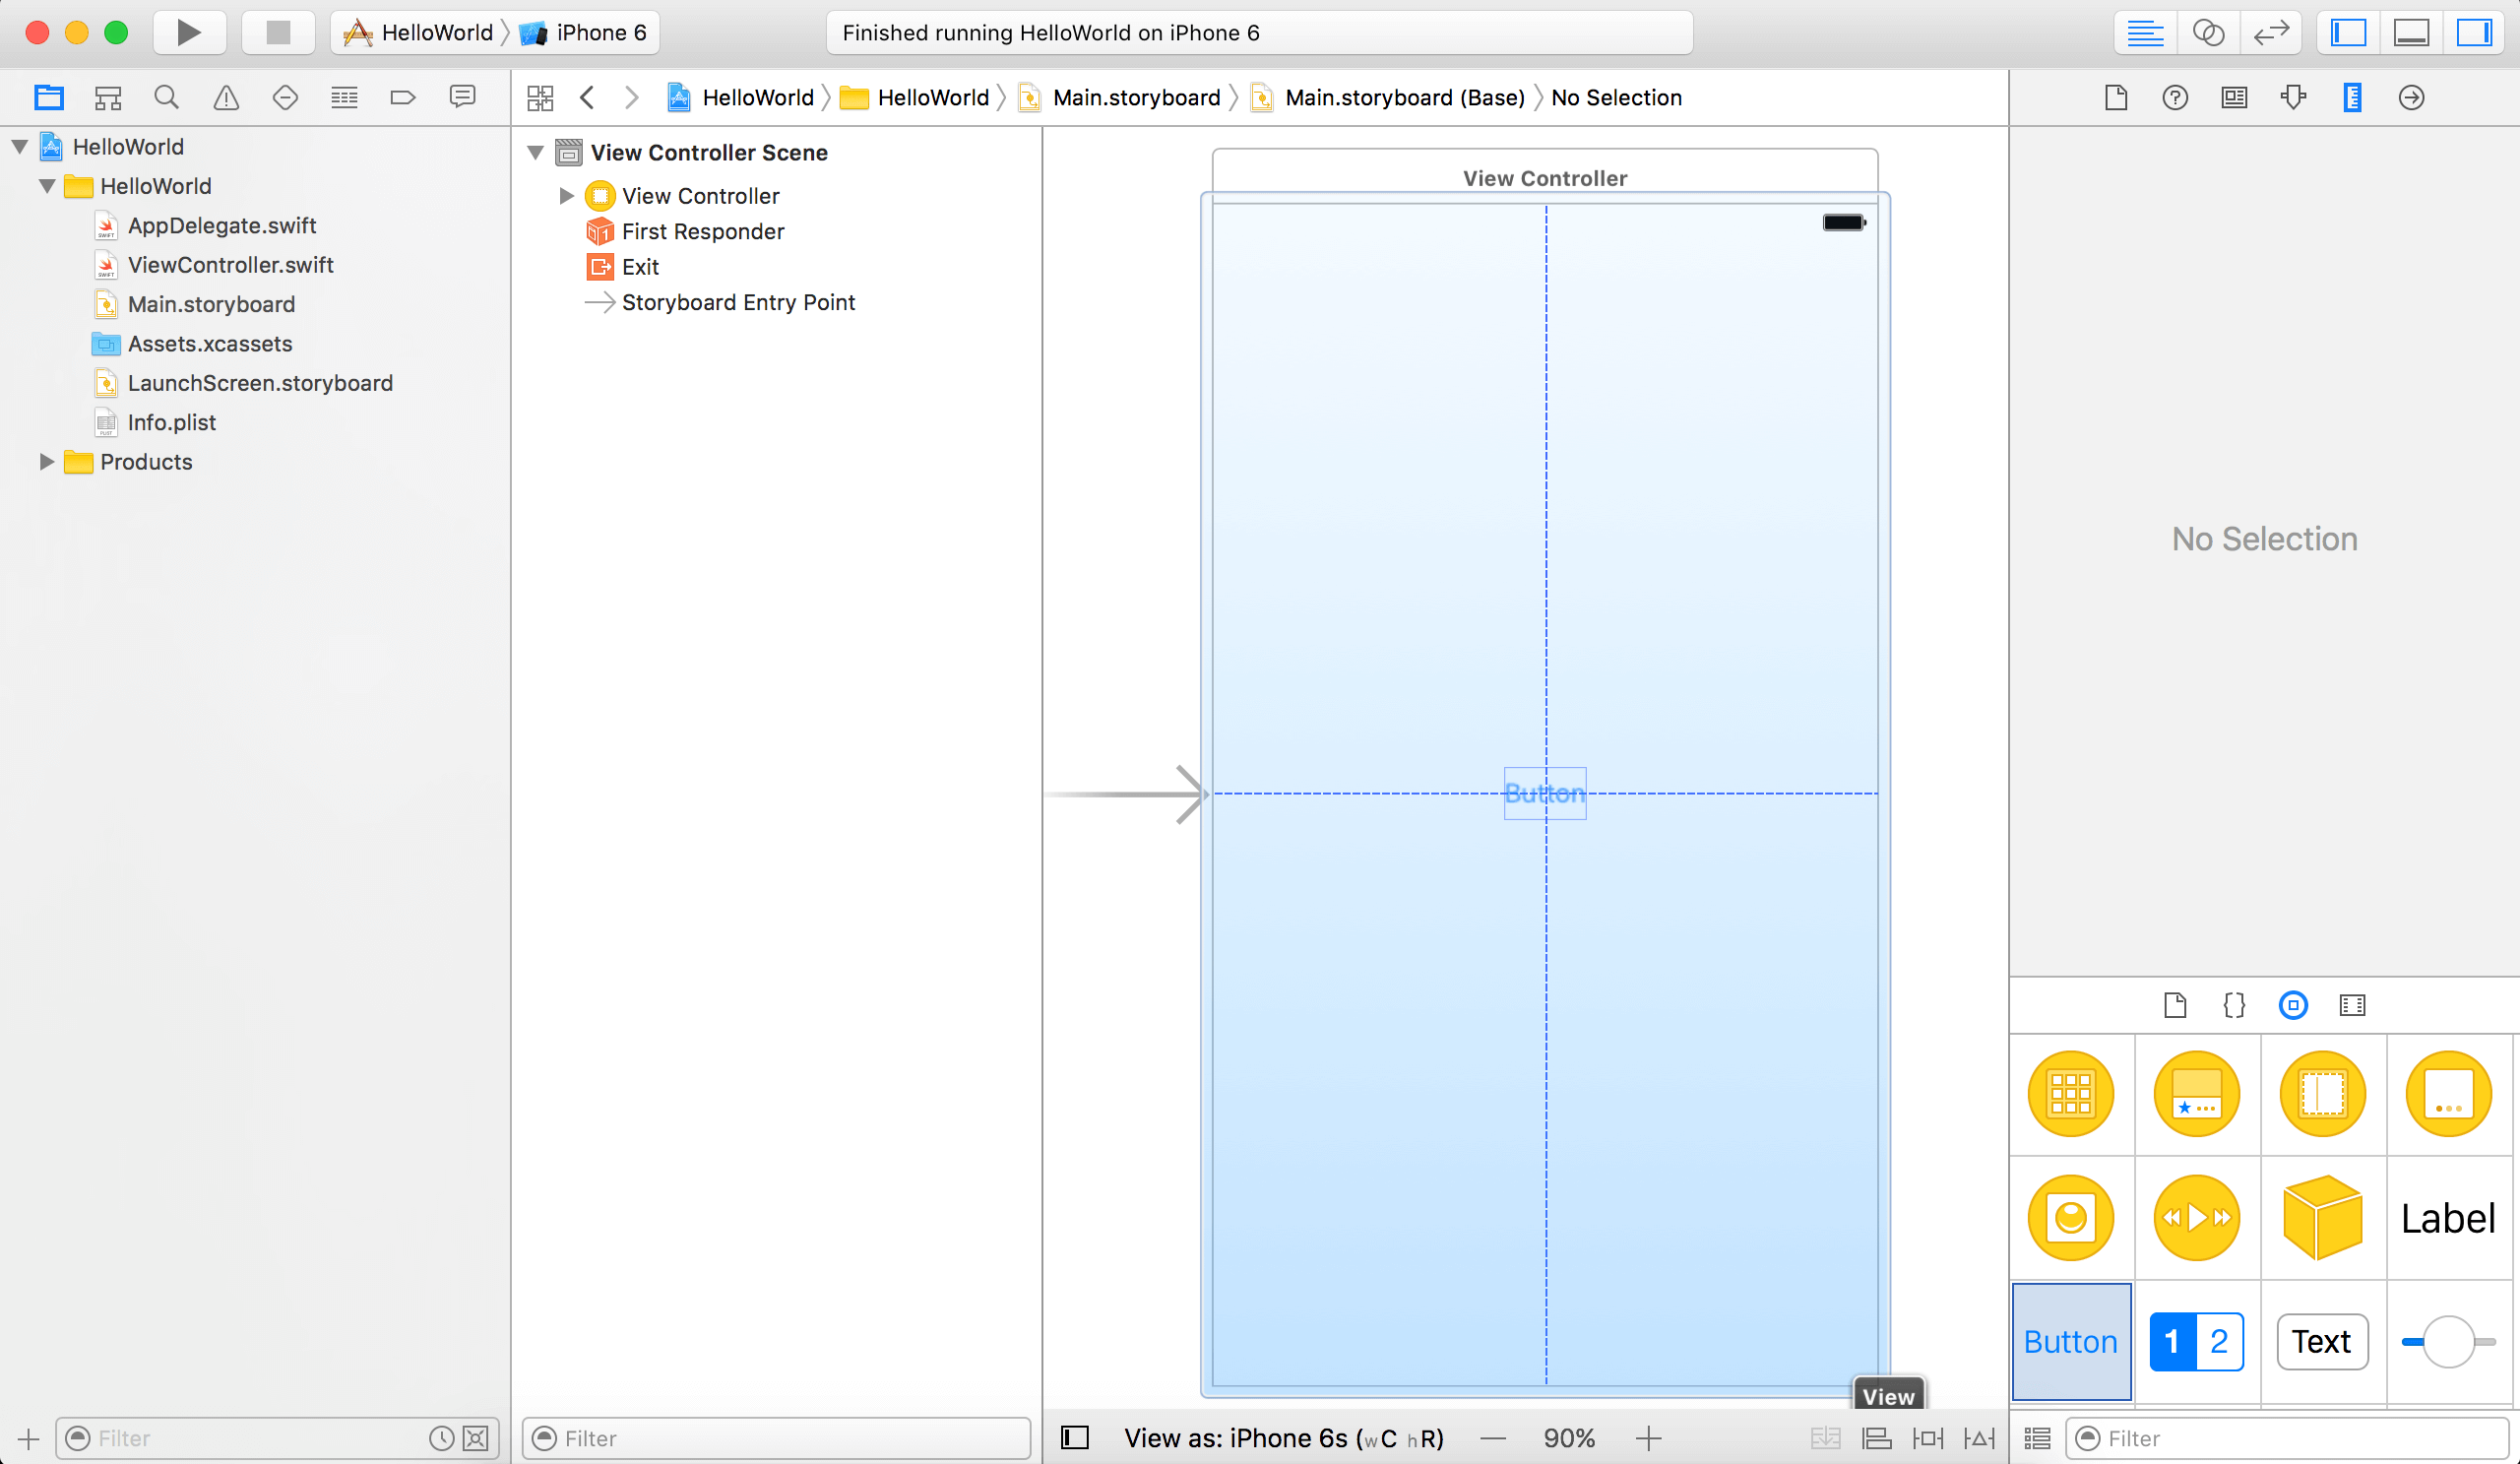
Now Xcode will create a project with all required resources and folder structure.User Interface will look like below screen.
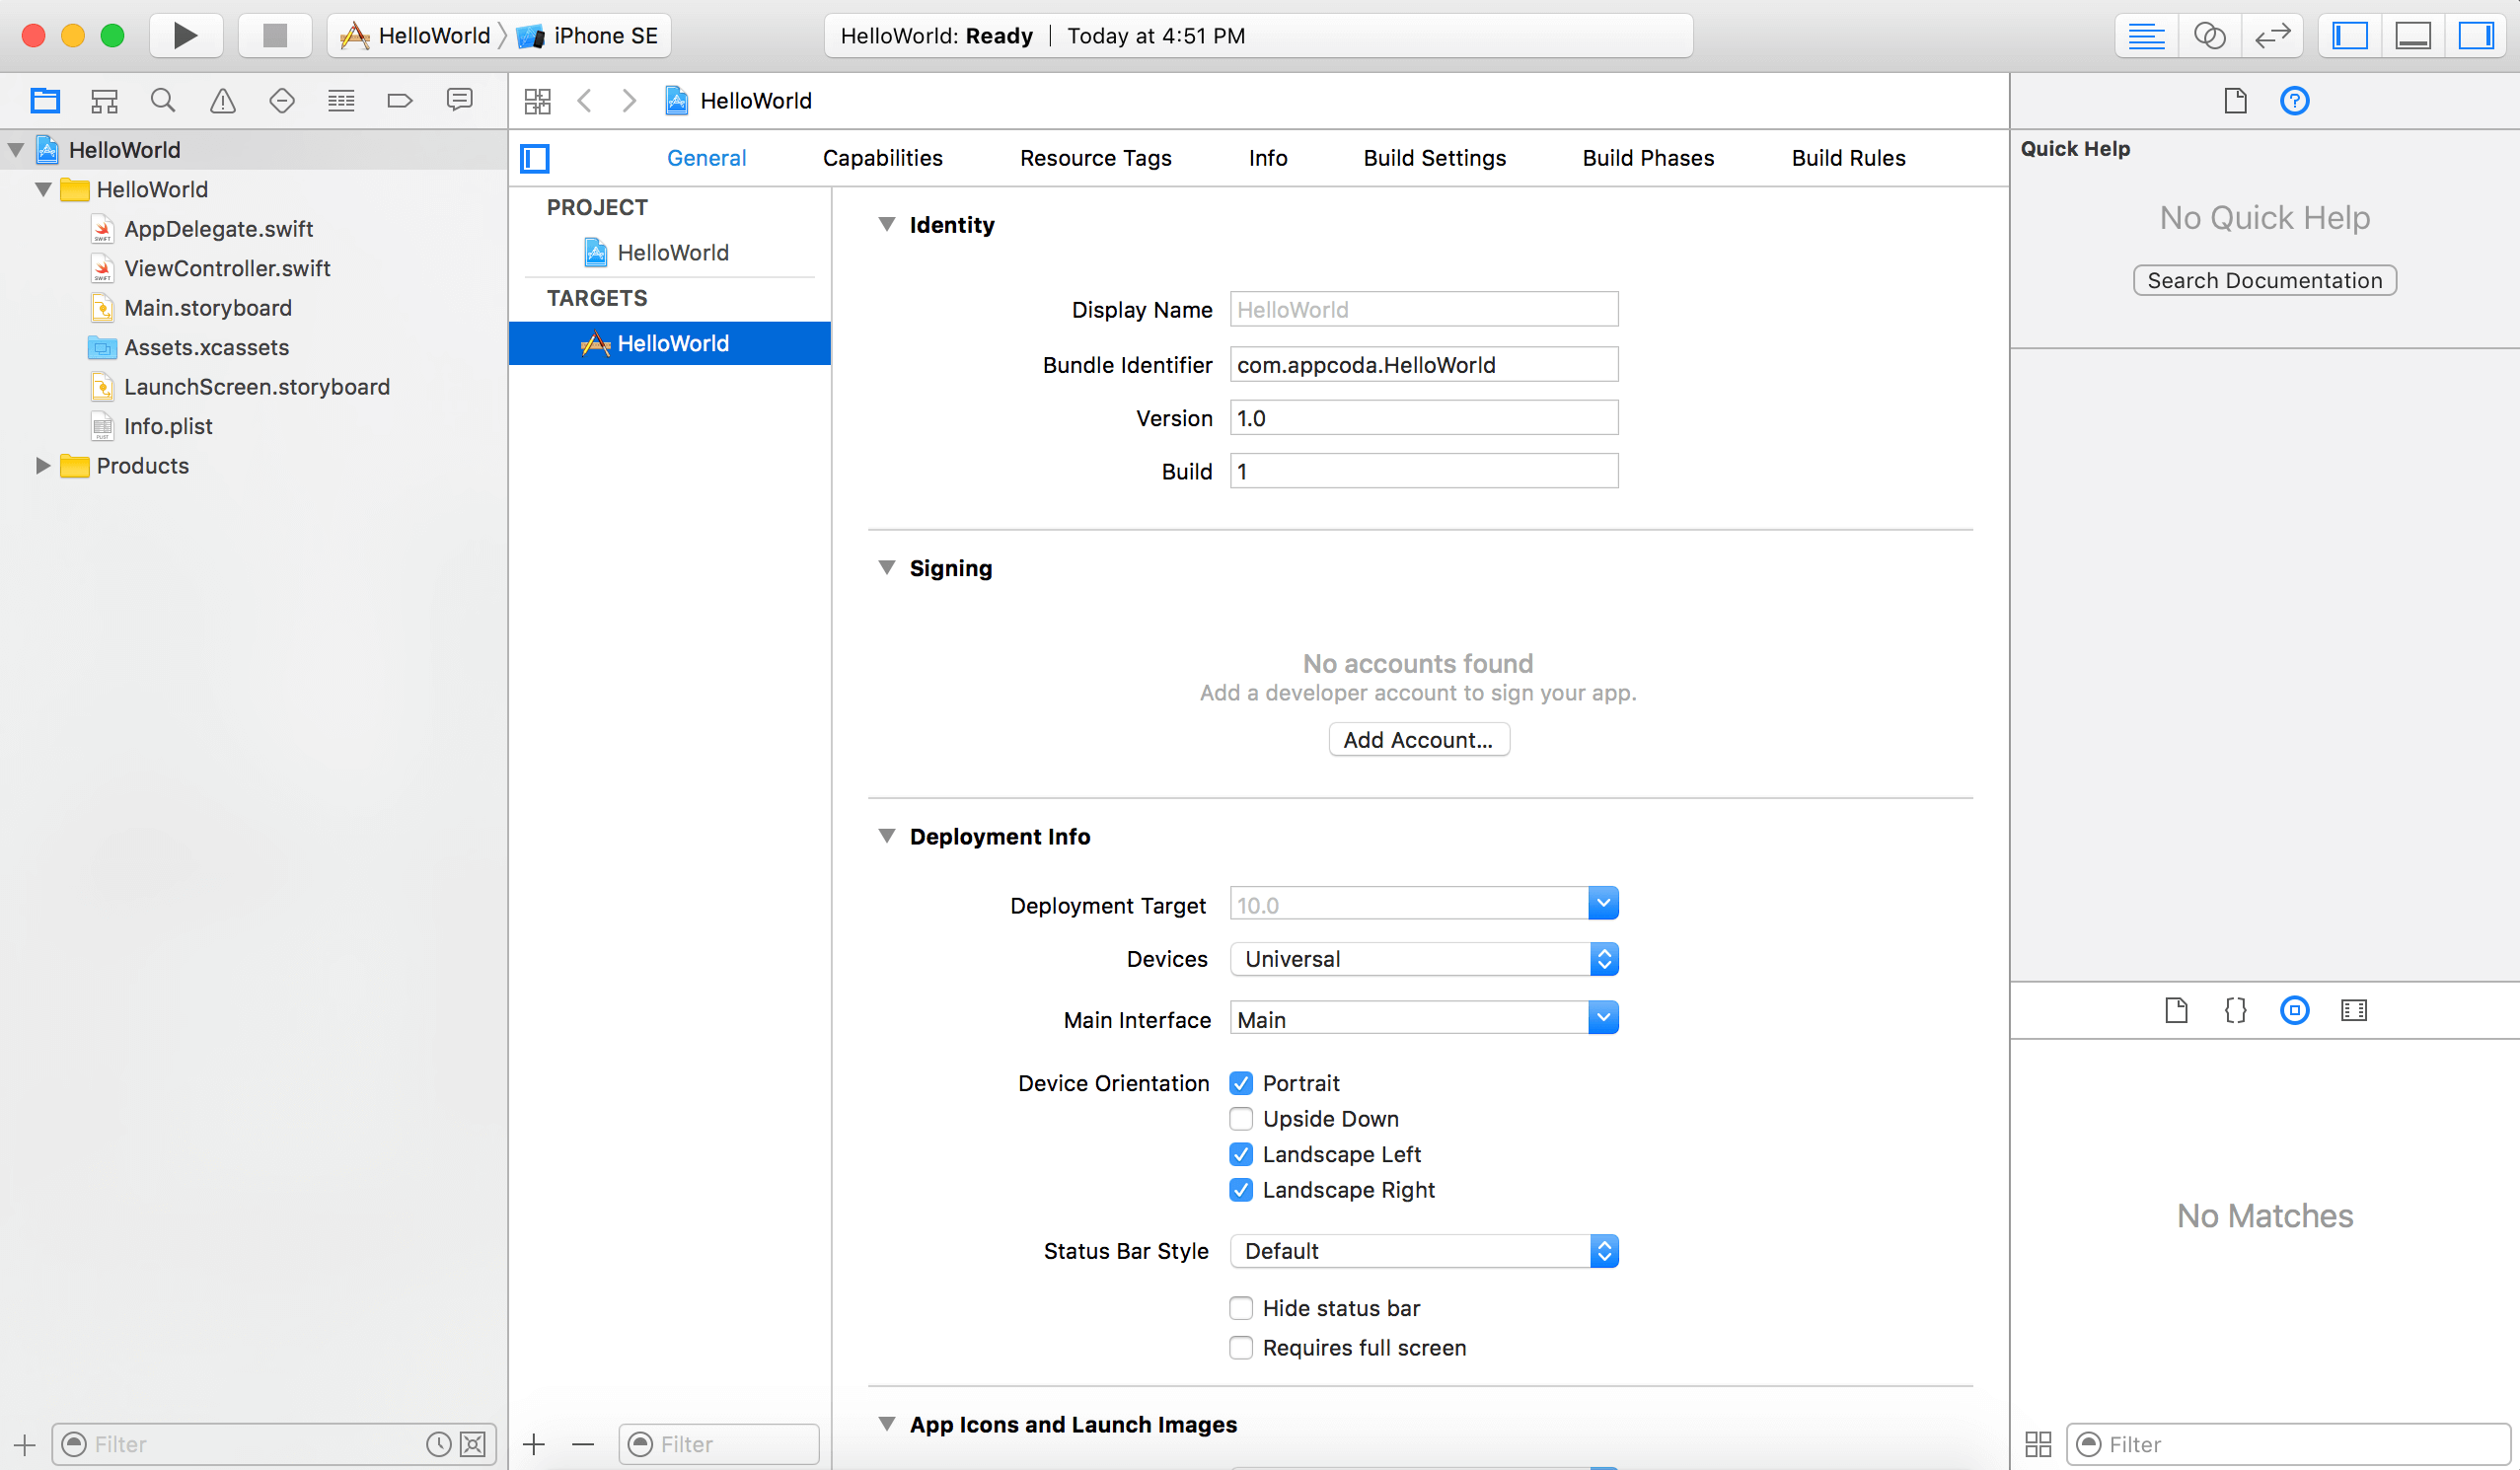
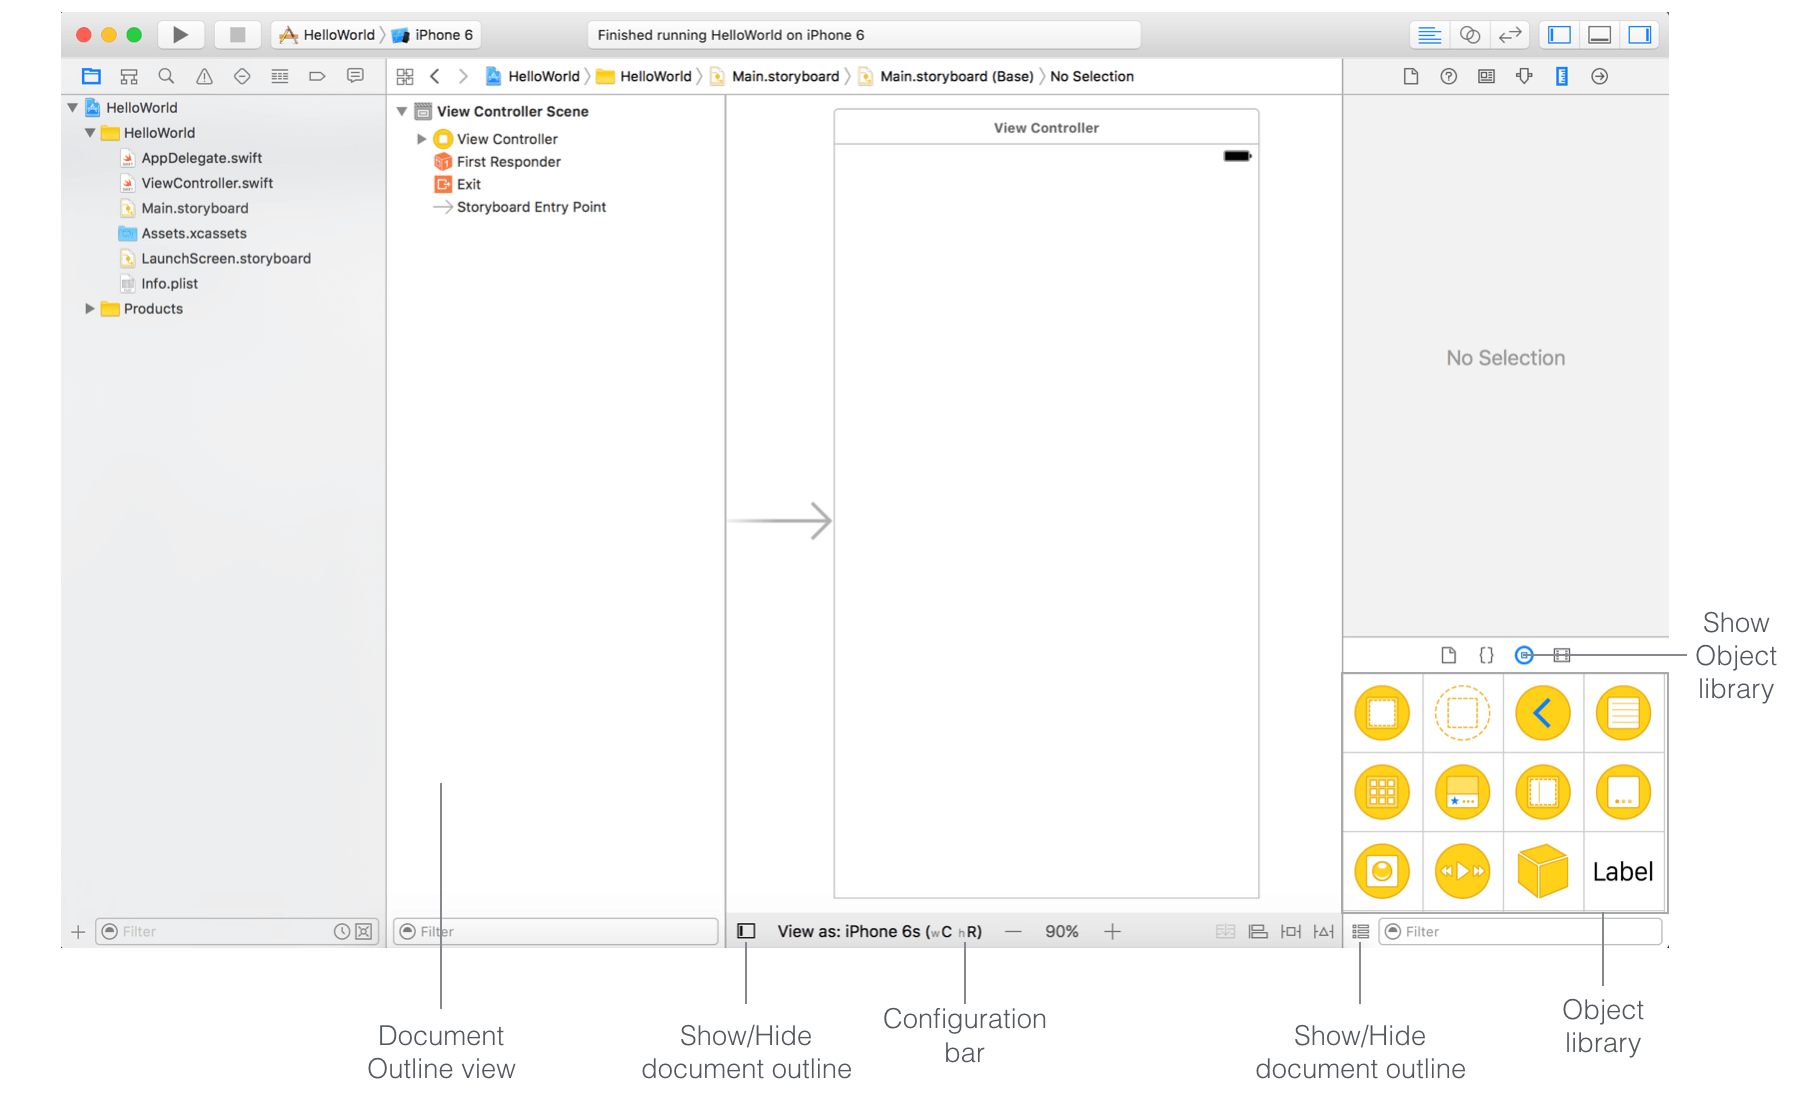
First look to Xcode Interface
Lets make a brief look to understand the Xcode Workspace.On the left pane there is a Project Navigator where all Project Files are shown.You can add or remove file over here for your app work.The center part of the workspace is Editor Area,all the editing stuff will apply in this are like designing,code editing,linking or refrencing.
According to your file selection in Project navigator Pane Editor area will shown the related file or interface.Means if you select the Viewcontroller.swift file,editor area will show the swift code and if you select the Main.Storyboard it will display the User Interface Design as visual Editor for storyboard ,where you can drag and drop the related controls.
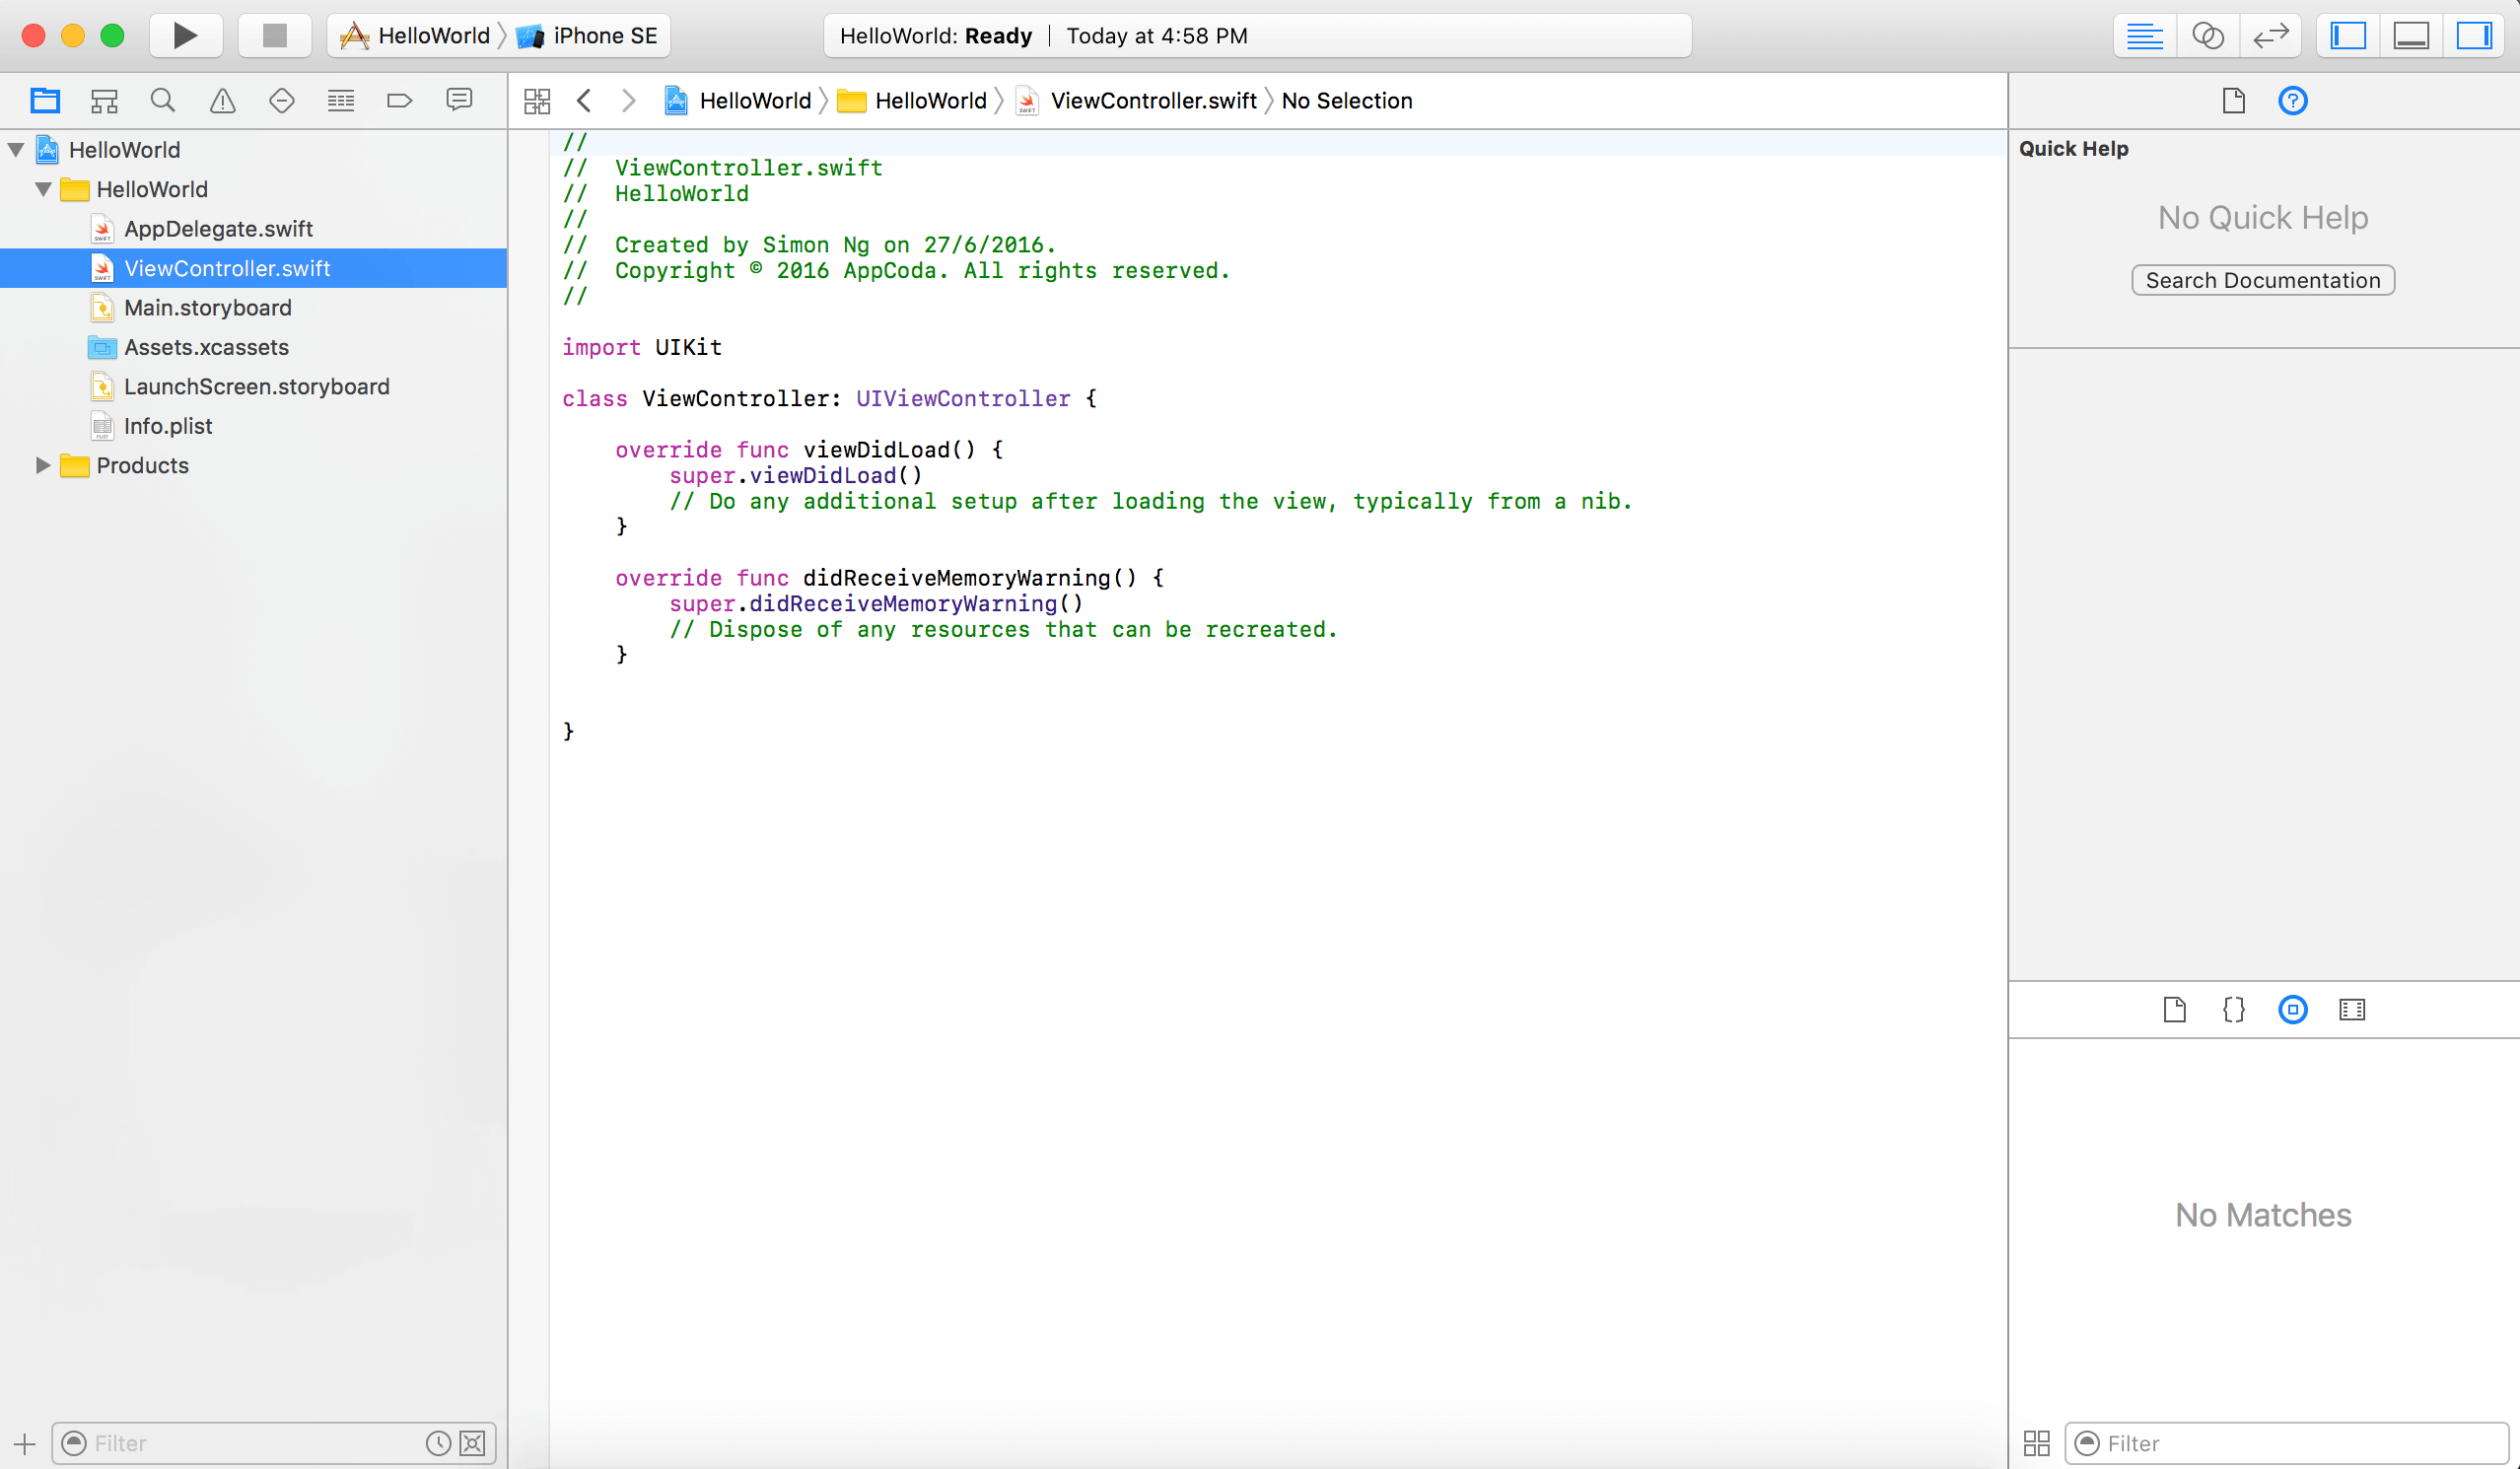
Here you can see the Viewcontroller.swift file code in Editor Area.
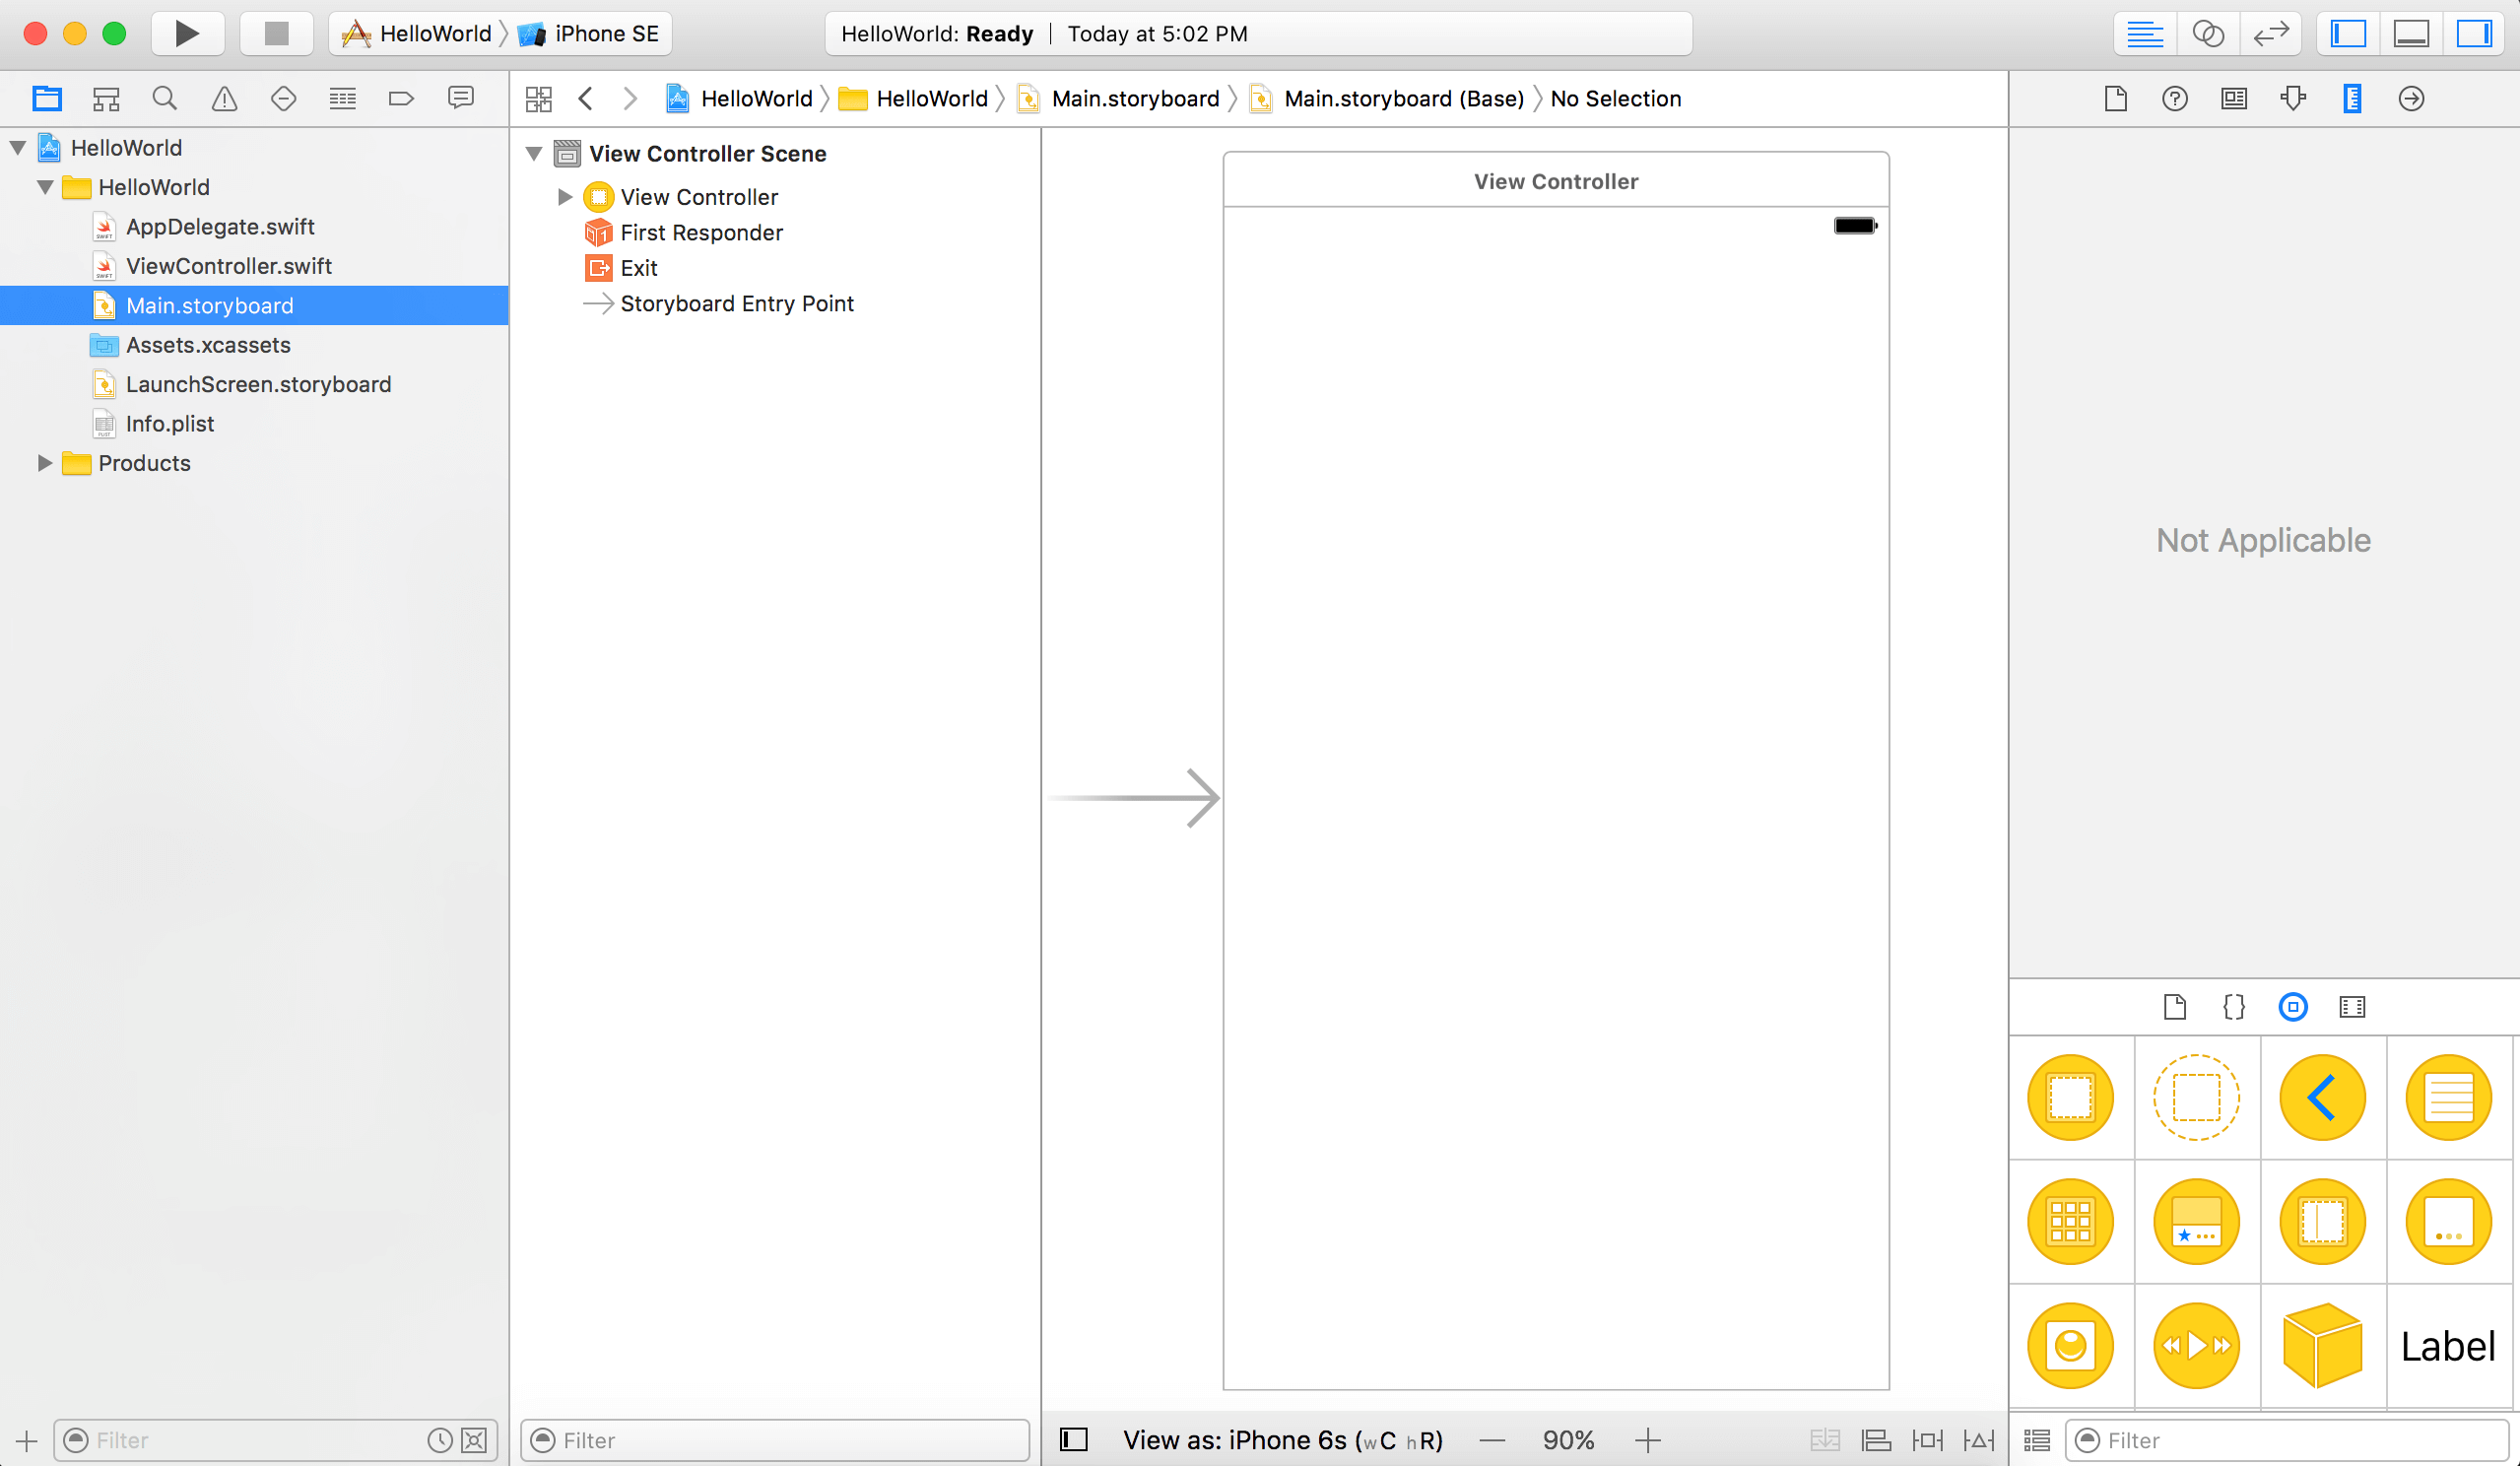
Above screen is of Storyboard User Interface to Design your iOS App
Utility Area
The rightmost pane is known as utility area of your Project. Here you will find the properties of the files. If you unable to view this area than you can select the rightmost button in the toolbar (at the top-right corner) to enable it.
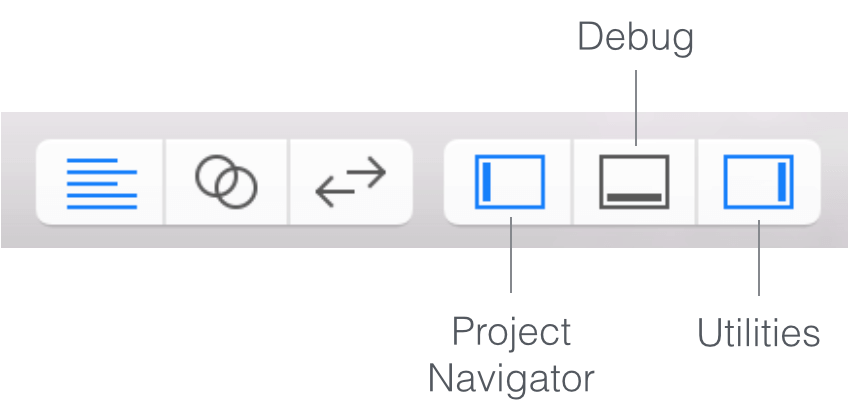
By using the utility bar buttons you can make visible or unvisible the Debug Area,Project navigator Area and others.
How to Design App in Interface Builder
Now here you learn how to create design in Xcode User Interface for y our first App.Now in Project navigator Pane select the Main.Storyboard file. It will brings up a visual editor for storyboards, which is known as Interface Builder. It provide a visual way for you to create and design your mobile App UIThrough Interface Builder's storyboard designer you can create multiple views and connect them by different methods or segue.
At the lower side of Right Pane you find a Object Library which contain your all Designing Objects like Button, Textfield, Labels.
As we chose the Single View Application template in our Project, Xcode generated a default view controller scene in the storyboard. In this view controller we design our app's user interface. Each screen of an iOS app is generally represented by a view controller. Interface Builder gives facility to add multiple view controllers to the storyboard .
What is Scene?
A single page of a app is considered as Scene which consist a View Controller and associated View for designing user interface.A view can contain multiple Objects like Buttons,Label,Textfield.
By Selecting a device on configuration Bar you can experience the desired output on different devices of iPhone.
Designing the User Interface
Now we are going to start design the app's user interface. First, we will add a button to the view and give a text caption of "Hello World". Fromt the bottom part of the utility area you can choose any UI objects, and drag-and-drop them into the view.
We want to add a button to the view so just drag a Button object from the Object library to the view.
Now rename the button by double-click it and name it "Hello World".
To test the app choose iPhone 6 or 6s simulator and press RUN button.
To show something on pressing button we have to write the code.Now we make a code to display "Hello World" message on clicking the button.
Writing Code on Button Object
In the project navigator select ViewController.swift file who has a ViewController class. This file is linked with the view controller in the storyboard. In order to display a message when the button is clicked let's write some code to the file.
Type the following lines of code in the ViewController class
import UIKit

class ViewController: UIViewController {

    override func viewDidLoad() {
        super.viewDidLoad()
        // Do any additional setup after loading the view, typically from a nib.
    }

    override func didReceiveMemoryWarning() {
        super.didReceiveMemoryWarning()
        // Dispose of any resources that can be recreated.
    }

    @IBAction func showMessage() {
        let alertController = UIAlertController(title: "Welcome to My First App", message: "Hello World", preferredStyle: UIAlertControllerStyle.alert)

        alertController.addAction(UIAlertAction(title: "OK", style: UIAlertActionStyle.default, handler: nil))

        present(alertController, animated: true, completion: nil)
    }
}
Here we add a showMessage() method in the ViewController class. When this action is called, writen code will instruct iOS to display a "Hello World" message on screen.
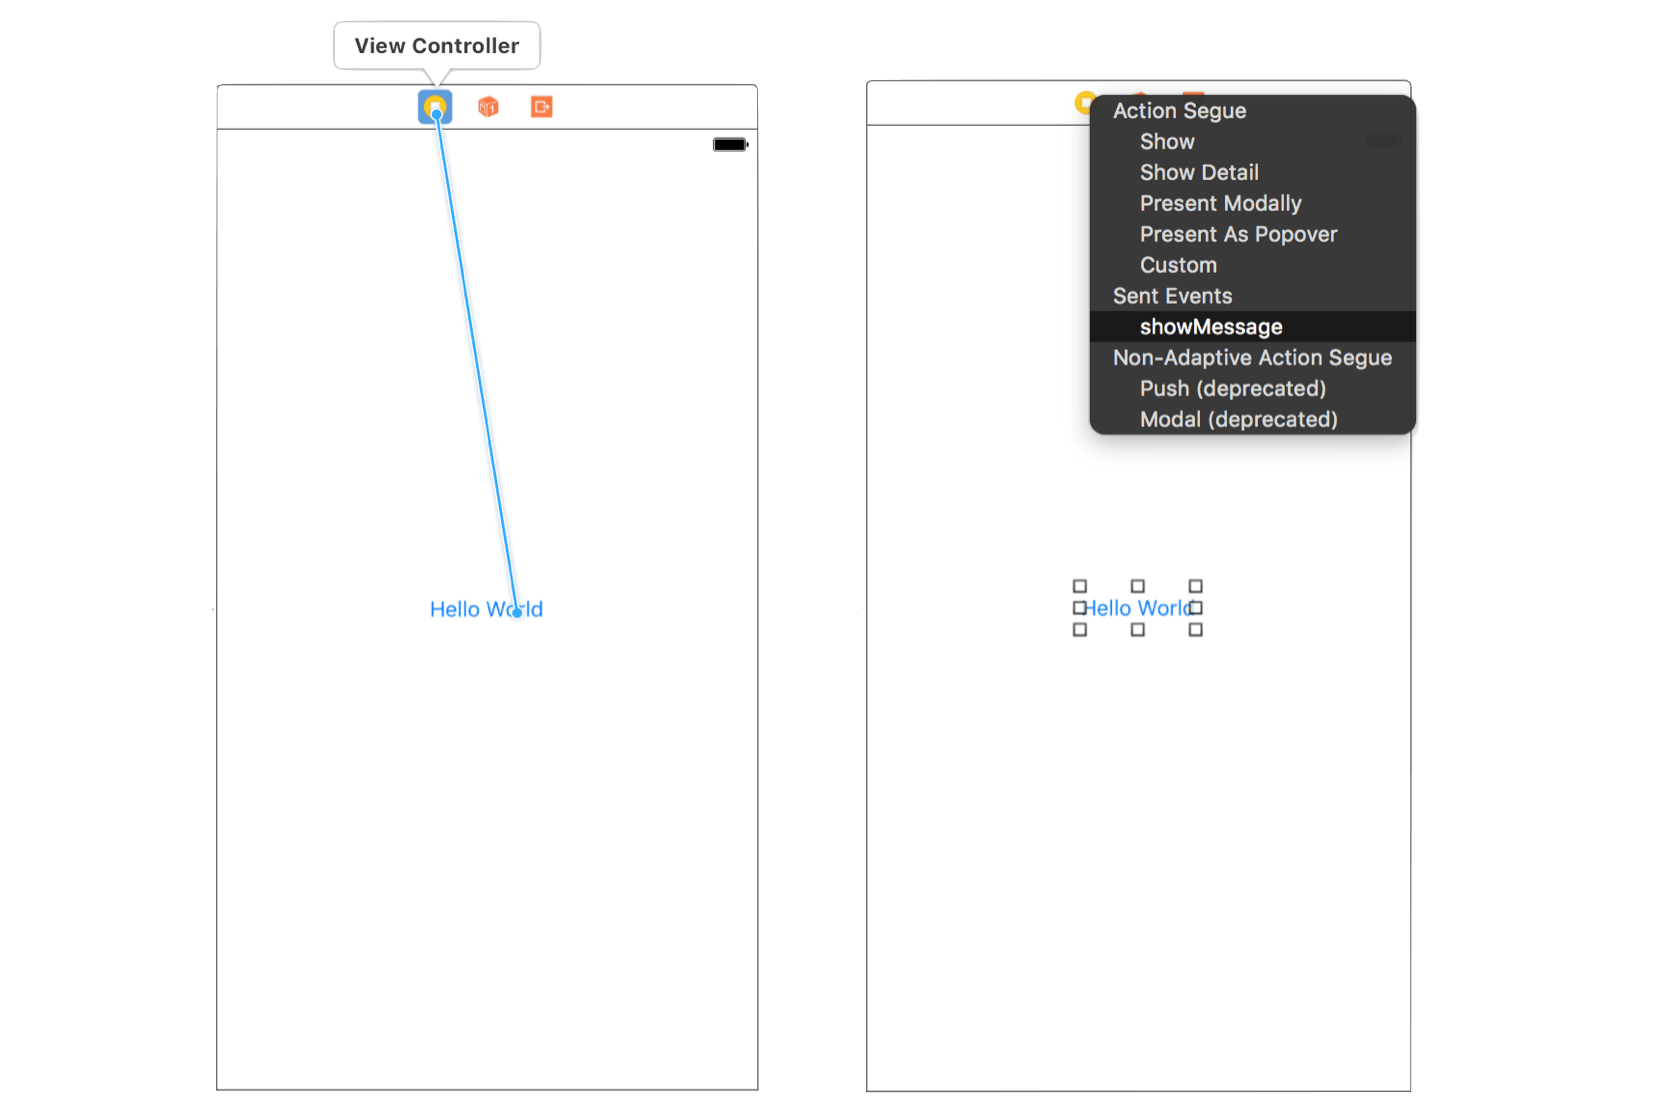
Now we have to link our method showMessage() in (.swift ) file to button Object in Storyboard.
Now select Main.storyboard in Project Navigator which show Interface Builder. Press and hold the control key of the keyboard, click the "Hello World" button and drag it to the View Controller yellow icon. Now release both buttons (mouse + keyboard) and a pop-up appears which shows the showMessage option under Sent Events. Select it to make a connection between the button and showMessage action.
Test Your App
That's it! You're now ready to test your first app. Just hit the Run button. If everything is correct, your app should run properly in the simulator. This time, the app displays a welcome message when you tap the Hello World button.